


Showing posts sorted by date for query buttercream. Sort by relevance Show all posts
Showing posts sorted by date for query buttercream. Sort by relevance Show all posts
Covering Cakes with Rolled Fondant
Covering Round Cakes with Rolled Fondant


Fondant amounts to cover cakes


Read more »
How do you cover a cake with fondant that's perfectly smooth, without wrinkles or air bubbles? The flexibility of fondant
is your secret weapon. Just follow our instructions for the right ways to knead, roll out and lift the fondant, and you'll
find that covering a cake is easy.
Steps
Step 1
Prepare cake by lightly covering with buttercream icing.
Fondant amounts to cover cakes
Step 2
Before rolling out fondant, knead it until it is a workable consistency. If fondant is sticky, knead in a little confectioner's sugar. Lightly dust your smooth work surface or the Roll & Cut Mat and your rolling pin with confectioner's sugar to prevent sticking. Roll out fondant sized to your cake. To keep fondant from sticking, lift and move as you roll. Add more confectioner's sugar if needed.
Step 3
Gently lift fondant over rolling pin and position on cake.
Step 4
Shape fondant to sides of cake with Easy-Glide Smoother. We recommend using the Smoother because the pressure of your hands may leave impressions
on the fondant.Use the straight edge of the Smoother to mark fondant at the base of cake. Trim off excess fondant using a spatula or sharp knife.
Step 5
Smooth and shape fondant on cake using Easy-Glide Smoother. Beginning in the middle of the cake top, move the Smoother outward and down the sides to smooth and shape fondant to the cake and remove air bubbles. If an air bubble appears, insert a pin on an angle, release air and smooth the area again.
Step 6
Your cake is now ready to decorate.
Covering Large Rounds with Rolled Fondant
In most cases, the smaller your cake, the easier it will be to cover with rolled fondant. However, there is an easy way to position and smooth fondant on cakes that are 12 in. diameter or larger. Follow the steps below to lift fondant onto the cake without tearing.
Step 1
Cover cake lightly with buttercream icing. Roll out fondant sized to your cake.
Step 2
Slide a large cake circle that has been dusted with confectioners' sugar under the rolled fondant. Lift the circle and the fondant and position over cake. Gently shake the circle to slide the fondant off the board and into position on the cake. Smooth and trim as described above.
Found at Wilton.com.Cake Decorating 101
Equipment
Pastry bags with plastic couplers
Assorted decorating tips
Straight and offset icing spatulas
Rotating cake stand or lazy Susan
Food coloring for tinting icing (optional)
Using a Coupler
A plastic coupler allows you to use different decorating tips while piping from one bag. To change decorating tips, unscrew the coupler ring, replace the decorating tip, and replace the ring.
Filling a Pastry Bag
1. "Cuff" the bag top over one hand, or place the bag, tip down, in a tall glass and fold cuff around the rim. Insert icing with a spatula using your other hand, scraping the icing against the side of the bag to release it. Do not fill the bag more than halfway. Unfold the cuff.
2. Gather the top edges together with one hand, and drag the thumb and index finger of your other hand downward to let out air, forcing icing into bag and decorating tip. Twist the top of the bag to close and to maintain pressure.
Creating the Perfect Base
Every icing job begins with a smooth layer of base icing.
1. Place a chilled cake on a platter or cardboard cake round, and transfer it to a rotating cake stand. Smooth on a base layer of slightly chilled buttercream with a straight icing spatula to seal the cake crumbs. Chill the cake until icing has hardened, about 15 minutes.
2. Coat the sides of the cake with 1/4 inch of buttercream. Hold the spatula parallel to the sides of the cake with the blade slightly angled towards you. Apply pressure with the spatula against the sides of the cake, and use your other hand to rotate the cake stand, smoothing the sides.
3. Spread excess icing from the sides onto the top of the cake and add more to coat. Position the spatula almost flat halfway across the top of the cake. Apply pressure as you rotate the cake stand, smoothing the top. Chill until the icing has hardened, about 15 minutes, before decorating.
Pastry bags with plastic couplers
Assorted decorating tips
Straight and offset icing spatulas
Rotating cake stand or lazy Susan
Food coloring for tinting icing (optional)
Using a Coupler
A plastic coupler allows you to use different decorating tips while piping from one bag. To change decorating tips, unscrew the coupler ring, replace the decorating tip, and replace the ring.
Filling a Pastry Bag
1. "Cuff" the bag top over one hand, or place the bag, tip down, in a tall glass and fold cuff around the rim. Insert icing with a spatula using your other hand, scraping the icing against the side of the bag to release it. Do not fill the bag more than halfway. Unfold the cuff.
2. Gather the top edges together with one hand, and drag the thumb and index finger of your other hand downward to let out air, forcing icing into bag and decorating tip. Twist the top of the bag to close and to maintain pressure.
Creating the Perfect Base
Every icing job begins with a smooth layer of base icing.
1. Place a chilled cake on a platter or cardboard cake round, and transfer it to a rotating cake stand. Smooth on a base layer of slightly chilled buttercream with a straight icing spatula to seal the cake crumbs. Chill the cake until icing has hardened, about 15 minutes.
2. Coat the sides of the cake with 1/4 inch of buttercream. Hold the spatula parallel to the sides of the cake with the blade slightly angled towards you. Apply pressure with the spatula against the sides of the cake, and use your other hand to rotate the cake stand, smoothing the sides.
3. Spread excess icing from the sides onto the top of the cake and add more to coat. Position the spatula almost flat halfway across the top of the cake. Apply pressure as you rotate the cake stand, smoothing the top. Chill until the icing has hardened, about 15 minutes, before decorating.
Found at MarthaStewart.com
Frosting bow

Icing: medium consistency
Tip: 104
Positions:
Bag: 45° angle 6:00
Tip: wide end touching, narrow end straight up
Sequence:
1. Squeeze, loop to left.
2. Squeeze, loop right.
3. Add two streamers.
Hold the bag at a 45° angle 6:00 to the surface. The wide end ofthe tip should touch the surface and the narrow end should point straightup. While squeezing, move the tip up and around to the starting point andcontinue around, making a second loop on the right. The two loops shouldform a figure 8. Still holding bag in the same position, return to the centerand squeeze out two streamers.
(To use with floral sprays: tie your floral spray together with one bow,using medium consistency Class Decorating Buttercream Icing in the colorof your choice. The bow should be placed 1 in. below the focal point ofthe bouquet.)
Tip: 104
Positions:
Bag: 45° angle 6:00
Tip: wide end touching, narrow end straight up
Sequence:
1. Squeeze, loop to left.
2. Squeeze, loop right.
3. Add two streamers.
Hold the bag at a 45° angle 6:00 to the surface. The wide end ofthe tip should touch the surface and the narrow end should point straightup. While squeezing, move the tip up and around to the starting point andcontinue around, making a second loop on the right. The two loops shouldform a figure 8. Still holding bag in the same position, return to the centerand squeeze out two streamers.
(To use with floral sprays: tie your floral spray together with one bow,using medium consistency Class Decorating Buttercream Icing in the colorof your choice. The bow should be placed 1 in. below the focal point ofthe bouquet.)
Found at Wilton.com
Lace
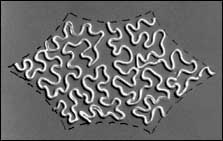
Lacework is a special cake decorating technique that is particularly suited to wedding, shower and fondant-covered cakes. Usually done in white on pastel cakes for feminine occasions, lacework requires nearly perfect pressure control. Continued practice should give you pleasing results.
Apply lacework to an entire cake or within a pattern on a cake. Use thinned buttercream or royal icing for buttercream frosted cakes; thinned royal or boiled for fondant-covered cakes. (For this lesson always use thinned buttercream icing.)
In Brief
Icing: thin consistency
Tip: plain tip 1
Positions:
Bag: slightly less than 90° angle
Tip: close enough to cake so that icing attaches without scraping cake with tip and without flattening icing strings.
Apply lacework to an entire cake or within a pattern on a cake. Use thinned buttercream or royal icing for buttercream frosted cakes; thinned royal or boiled for fondant-covered cakes. (For this lesson always use thinned buttercream icing.)
In Brief
Icing: thin consistency
Tip: plain tip 1
Positions:
Bag: slightly less than 90° angle
Tip: close enough to cake so that icing attaches without scraping cake with tip and without flattening icing strings.

Sequence:
Beginning and ending at edge that will later be covered with a border, pipe a meandering icing string line.
Move tip up, around and down to produce a lacy effect (should look like a series of "R's" or "S's").
Do not let lines touch or cross.
Let dry before adding other icing trims.
Explanation:
Hold your decorating bag at slightly less than a 90° angle.
Keep tip close enough to cake so that icing attaches without scraping cake with tip and without flattening icing strings.
Always begin and end cornelli lace at edge that will later be covered with a tip 14 border.
Cornelli lace is a series of smooth "R's" or "S's".
Cornelli lace lines never cross or touch.
Cornelli lace does not follow any type of pattern.
Beginning and ending at edge that will later be covered with a border, pipe a meandering icing string line.
Move tip up, around and down to produce a lacy effect (should look like a series of "R's" or "S's").
Do not let lines touch or cross.
Let dry before adding other icing trims.
Explanation:
Hold your decorating bag at slightly less than a 90° angle.
Keep tip close enough to cake so that icing attaches without scraping cake with tip and without flattening icing strings.
Always begin and end cornelli lace at edge that will later be covered with a tip 14 border.
Cornelli lace is a series of smooth "R's" or "S's".
Cornelli lace lines never cross or touch.
Cornelli lace does not follow any type of pattern.
Found at Wilton.com
Chocolate Poured Fondant
Follow recipe Quick-Pour Fondant Icing recipe, but increase amount of water by 1 ounce. After fondant is heated, stir in 3 ounces of melted, unsweetened chocolate, then add flavoring.
Quick-Pour Fondant Icing
Ingredients:
6 cups confectioners' sugar, sifted
1/2 cup water (4 ounces)
2 tablespoons white corn syrup
1 teaspoon Wilton Almond Extract
Icing Colors, optional
Combine water and corn syrup. Add to sugar in a saucepan and stir over low heat until well-mixed and heated to 92°F, thin enough to be poured, but thick enough so it won't run off the cake. Stir in extract and Icing Color, if desired. To cover cake, ice smoothly with buttercream and let icing crust, or cover with apricot glaze (recipe below). Place cake on cooling rack with a cookie sheet beneath it. Pour fondant over iced cake, flowing from center and moving out in a circular motion. Touch up sides with a spatula. Excess fondant can be stored, tightly covered, in refrigerator for weeks. Reheat to use again.
YIELD: 4 cups, enough to cover a 10 in. round cake. Recipe may be doubled or tripled.
Quick-Pour Fondant Icing
Ingredients:
6 cups confectioners' sugar, sifted
1/2 cup water (4 ounces)
2 tablespoons white corn syrup
1 teaspoon Wilton Almond Extract
Icing Colors, optional
Combine water and corn syrup. Add to sugar in a saucepan and stir over low heat until well-mixed and heated to 92°F, thin enough to be poured, but thick enough so it won't run off the cake. Stir in extract and Icing Color, if desired. To cover cake, ice smoothly with buttercream and let icing crust, or cover with apricot glaze (recipe below). Place cake on cooling rack with a cookie sheet beneath it. Pour fondant over iced cake, flowing from center and moving out in a circular motion. Touch up sides with a spatula. Excess fondant can be stored, tightly covered, in refrigerator for weeks. Reheat to use again.
YIELD: 4 cups, enough to cover a 10 in. round cake. Recipe may be doubled or tripled.
Found at Wilton.com.
Buttercream Frosting
1 lb. confectioners' sugar
1/2 c. butter, softened
1 tsp. vanilla extract
3 tbsp. milk
Food coloring (optional)
In large bowl, beat together sugar, butter, vanilla and milk until smooth. If necessary add more milk until frosting is spreading consistency. If desired, add a few drops of food coloring. Mix everything well.
Chocolate buttercream frosting - add 1/2 cup Hershey's cocoa.
1/2 c. butter, softened
1 tsp. vanilla extract
3 tbsp. milk
Food coloring (optional)
In large bowl, beat together sugar, butter, vanilla and milk until smooth. If necessary add more milk until frosting is spreading consistency. If desired, add a few drops of food coloring. Mix everything well.
Chocolate buttercream frosting - add 1/2 cup Hershey's cocoa.
Found at Cooks.com.

